Revolutionizing Tattoo Aftercare: The Advanced Saniderm Healing Protocol
Are you tired of the painstaking, often frustrating process of healing a new tattoo, only to be left with results that don’t quite live up to your expectations? Many enthusiasts spend countless hours meticulously caring for their fresh ink, only to face issues like excessive scabbing, dulling colors, or discomfort. The traditional healing methods, while functional, can be incredibly high-maintenance and prone to user error, sometimes compromising the final aesthetic of the artwork.
The video above touches upon a highly effective, low-maintenance approach to superior tattoo healing, emphasizing the strategic use of advanced transparent adhesive bandages, commonly known as Second Skin or Saniderm. This protocol moves beyond conventional techniques, promising not only a smoother healing journey but also optimal ink retention and vibrancy. Let’s delve deeper into this expert-level regimen, dissecting each critical phase to ensure your new tattoo heals flawlessly.
Phase 1: Immediate Post-Appointment Care – The Crucial First Hours
Upon leaving the tattoo studio, your fresh artwork will typically be enveloped in a temporary clear wrap, applied by your artist. This initial barrier, whether it be cling film or a preliminary adhesive bandage, serves one primary purpose: to safeguard the open wound from environmental contaminants and bacteria during your journey home. Its protective function is short-lived; prolonged use can create a humid, bacteria-friendly environment, counteracting its intended benefit. Therefore, the first step in this advanced tattoo healing protocol is to promptly remove this initial wrap once you are in a clean environment.
1. Airing Out for Optimal Skin Recovery: After removing the initial wrap, resist the urge to immediately clean or cover the tattoo. The skin, having just undergone a significant trauma during the tattooing process, requires a period of rest and recovery. Allowing the tattooed area to breathe for approximately 30 minutes is the ideal “sweet spot.” This brief aeration significantly aids in reducing the initial redness, swelling, and irritation, preparing the dermis for subsequent aftercare steps. It’s a critical moment for the skin to begin its natural repair processes without additional stress.
2. Gentle Cleansing and Preparation: Following the resting period, it’s time for the first thorough cleanse. Maintaining impeccable hygiene is paramount at this stage. Always begin by washing your hands meticulously with an unscented antibacterial soap to eliminate any potential pathogens. Then, proceed with the following steps:
- Lukewarm Water Application: Gently wet the tattooed area with lukewarm water. Hot water can be excessively harsh on freshly traumatized skin, potentially increasing inflammation or discomfort, while cold water, though soothing, is best reserved for a later step to maximize its pore-sealing benefits.
- Soft Lather and Circular Massage: Apply a small amount of unscented antibacterial soap, lathering it gently in your clean hands before delicately massaging it onto the tattoo in light, circular motions. The goal is to remove any residual blood, plasma, excess ink, and Vaseline without causing further irritation or disrupting the fragile epidermal layer. This active cleaning helps prevent plasma buildup, a common precursor to thick scabbing.
- Cold Water Rinse & Pore Closure: A swift rinse with cold water is a “super pro tip” for a reason. Beyond effectively removing soap residue, cold water constricts the capillaries and pores in the tattooed area. This action not only provides a soothing sensation but, more importantly, helps to “trap that ink in better” by encouraging the skin to seal more efficiently. This can significantly contribute to superior ink retention and sharper lines.
- Delicate Drying: Pat the tattoo dry using a clean paper towel. Avoid rubbing, as this can irritate the sensitive skin and potentially disrupt the fragile healing tissue. Simply lay the paper towel over the tattoo to absorb moisture, allowing the skin to air dry completely afterward.
3. Initial Moisturization with Aquaphor: For this first day only, once the tattoo is bone dry, apply a very thin layer of Aquaphor. The purpose of this initial barrier is to provide gentle moisturization and a protective sheath, supporting the skin’s initial healing without suffocating it. It’s crucial not to over-apply; a thin, breathable layer is all that’s needed to facilitate skin barrier function without occluding the pores.
Phase 2: Introducing Second Skin – The Day Two Advantage
While the immediate thought for some might be to apply a Saniderm or Second Skin bandage immediately after the tattoo session, this expert protocol strongly advocates for waiting until Day Two. This crucial delay is a cornerstone of minimizing complications and ensuring superior healing outcomes.
1. Why the Delay? Managing Weeping and Plasma: The primary reason for deferring Second Skin application is the initial physiological response of a fresh tattoo. Immediately post-tattooing, the wound will “weep” – exuding blood, plasma, and interstitial fluid. Plasma, rich in proteins and antibodies, is a natural part of the healing cascade, but excessive buildup under an occlusive dressing can create a suboptimal environment. Trapping significant amounts of this fluid can lead to:
- Irritation: The skin can become overly moist and macerated, increasing sensitivity.
- Infection Risk: A warm, moist, nutrient-rich environment is an ideal breeding ground for bacteria.
- Compromised Adhesion: Excessive fluid can lift the bandage, creating gaps for bacteria to enter.
2. Saniderm Application – Precision and Hygiene: On the morning of Day Two, repeat the thorough cleansing process with antibacterial soap and cold water rinse. Ensure the tattoo is completely, unequivocally dry before proceeding with Saniderm application. Any residual moisture will compromise adhesion and create a breeding ground for bacteria. When applying Saniderm:
- Clean Hands are Non-Negotiable: Always start with freshly washed and dried hands.
- Smooth, Air-Bubble-Free Application: Carefully peel back the backing of the Saniderm and apply it over the tattoo, ensuring at least a one-inch margin around the entire tattooed area. Smooth it down firmly, working from the center outwards to eliminate any air bubbles or wrinkles. Air pockets can trap fluids or create areas where the bandage might lift.
- Assistance for Tricky Areas: For tattoos located in hard-to-reach or awkwardly contoured areas, enlisting the help of a trusted, hygienic friend can make the application significantly easier and more effective.
Phase 3: The Saniderm Advantage – Living with Your Second Skin
Once properly applied, Saniderm transforms the tattoo healing experience into a remarkably low-maintenance endeavor. This medical-grade adhesive acts as a “second skin,” creating a sterile, breathable barrier that protects the tattoo from external contaminants while allowing the skin to breathe and heal naturally in its own moist environment.
1. Uninterrupted Healing and Protection: With Saniderm in place, you gain newfound freedom. You can shower normally, sleep without worrying about your tattoo sticking to sheets, and continue your daily activities with a significantly reduced risk of external damage or bacterial exposure. The bandage forms an impenetrable shield, safeguarding the delicate healing tissue beneath.
2. Optimal Wear Duration: Leave the Saniderm on for no more than five days. While some individuals may suggest longer durations, a five-day wear period strikes an excellent balance, allowing sufficient time for the initial epidermal regeneration without risking skin maceration or prolonged occlusion that could lead to sensitivity for some skin types. Throughout this period, conduct daily visual checks to ensure the Saniderm remains securely adhered without peeling, particularly around the edges.
Phase 4: Post-Saniderm Care – Ensuring Long-Term Vibrancy
The removal of Second Skin is another critical juncture in the healing process where many commonly err, potentially compromising the integrity of their newly healed tattoo. Precision and gentleness are key.
1. The Art of Saniderm Removal: Avoid ripping the Saniderm off abruptly, as this can physically stress the healing skin, potentially pulling up scabs (even micro-scabs) and extracting precious ink. Instead, find an edge and gently pull the bandage *downwards*, parallel to the skin, stretching it slightly as you go. This technique minimizes trauma and ensures a smooth, non-damaging removal. If resistance is felt, a gentle stream of lukewarm water in the shower can help to loosen the adhesive.
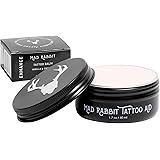
2. Post-Removal Cleansing and Moisturizing: Immediately after removing the Saniderm, cleanse the tattoo again with your unscented antibacterial soap and lukewarm water, followed by a cold water rinse and careful patting dry. This removes any adhesive residue and prepares the skin for continued moisturizing. Then, transition to a dedicated tattoo moisturizer. While Aquaphor is excellent for initial stages, a specialized tattoo balm like Evolve tattoo balm can provide more targeted nourishment for the maturing skin.
3. Addressing Potential Peeling: Even with advanced healing methods, it’s possible for some residual peeling to occur after Saniderm removal, especially on different body parts where skin thickness or movement varies. If you observe peeling, continue to moisturize the tattoo diligently, applying the balm three to five times a day. The consistent application supports the skin’s final exfoliation phase and keeps the new dermal layer hydrated and healthy.
This comprehensive, multi-phase tattoo healing protocol, centered around the strategic application and removal of Second Skin, elevates the standard of aftercare. By meticulously managing the immediate post-tattoo period, optimizing Saniderm use, and transitioning to specialized long-term moisturization, enthusiasts can achieve unparalleled healing results, ensuring their investment in body art remains vibrant and impeccable for years to come. This approach truly transforms the journey of healing tattoos.
Tattoo Aftercare Mastery: Your Q&A
What is ‘Second Skin’ or ‘Saniderm’ for tattoos?
Second Skin or Saniderm is an advanced transparent adhesive bandage that acts like a protective layer over your new tattoo. It helps create a sterile and breathable environment for optimal healing.
Why should I use Second Skin for my new tattoo?
Using Second Skin can lead to a smoother healing process with less scabbing, better ink retention, and more vibrant results. It also protects your tattoo from external contaminants like dirt and bacteria.
When is the best time to apply Second Skin to a new tattoo?
It’s recommended to wait until Day Two after your tattoo. This allows the initial weeping of fluids to subside and ensures the tattoo is thoroughly cleansed before applying the bandage for optimal adhesion and reduced risk of irritation.
How long should I keep Second Skin on my tattoo?
You should leave the Second Skin on for no more than five days. This period allows sufficient time for the initial healing without risking skin maceration or prolonged occlusion.
What is the correct way to remove Second Skin from my tattoo?
To remove it, gently pull the bandage downwards, parallel to your skin, stretching it slightly as you go. Avoid ripping it off abruptly, as this can stress the healing skin; a gentle stream of lukewarm water in the shower can also help loosen the adhesive.