With consumers consistently seeking personalized items, the market for custom creative solutions continues to expand rapidly across various sectors. Recent industry analyses indicate a substantial surge in demand for bespoke products, making DIY projects like crafting custom tattoo stickers an incredibly popular endeavor for both individuals and small businesses. The accompanying video demonstrates the visual process of utilizing inkjet printable temporary tattoo paper to achieve professional-looking results. This article offers an in-depth, expert guide, complementing the visual demonstration by delving into the nuanced techniques and crucial considerations involved in creating your own unique temporary tattoos effectively.
Understanding Inkjet Printable Temporary Tattoo Paper
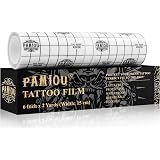
Inkjet printable temporary tattoo paper is an innovative medium designed to transfer custom designs onto skin using standard home inkjet printers. This specialized paper typically comprises two key components: a printable transfer sheet and a thin adhesive film. The transfer sheet, often coated for optimal ink absorption, holds your design which is then sealed with the clear adhesive layer. Understanding the properties of this inkjet printable temporary tattoo paper is crucial for ensuring vibrant colors and durable transfers. Different brands may offer varying qualities, impacting aspects like transfer clarity and skin adherence, so careful selection of your materials is highly recommended.
Unlike traditional decals, these custom tattoo stickers are engineered for temporary skin application, lasting anywhere from a few days to a week depending on placement and care. The science behind their adherence involves a water-slide transfer mechanism, which allows the printed, laminated image to separate from its paper backing when moistened. This meticulous process facilitates a smooth, skin-friendly application without causing irritation for most users. Furthermore, the non-toxic nature of reputable temporary tattoo papers ensures they are safe for recreational use. Achieving professional outcomes with custom tattoo stickers begins with a foundational understanding of these material characteristics and their interaction.
Essential Materials for Crafting Custom Tattoo Stickers
Successfully producing high-quality custom tattoo stickers requires more than just the specialized paper; a curated selection of tools and materials significantly enhances the final product. Obviously, you will need your inkjet printable temporary tattoo paper itself, ensuring it is compatible with your specific printer model. An inkjet printer, preferably one with fresh ink cartridges, is essential for vibrant and crisp design output. Utilizing high-resolution images or vector graphics will prevent pixelation, guaranteeing the sharpness of your intricate designs. Precision cutting tools, such as sharp scissors or a craft knife, are indispensable for cleanly delineating each individual tattoo.
Additional items like a squeegee or a credit card are incredibly useful for smoothly applying the adhesive layer, eliminating unsightly air bubbles and creases. A flat, clean work surface is paramount for preventing dust or debris from compromising your adhesive bond during preparation. Furthermore, a bowl of water and a sponge will be necessary during the actual application phase. Having all these components readily available streamlines the production process, minimizing errors and maximizing the professional appearance of your custom tattoo stickers. Each element plays a pivotal role in transforming a digital design into a tangible, wearable piece of temporary art.
Mastering Your Design: Pre-Printing Preparations
Before any ink touches the inkjet printable temporary tattoo paper, meticulous design preparation is paramount for achieving stunning results. High-resolution images, ideally 300 DPI or greater, prevent pixelation and ensure crisp details in your custom tattoo stickers. Graphic design software such as Adobe Photoshop, Illustrator, GIMP, or even simpler tools like Canva, offers the necessary capabilities for creating and refining your artwork. Consider the final size and placement of your temporary tattoos during the design phase, as scaling issues can significantly compromise clarity and aesthetic appeal. Text elements require particular attention to legibility when scaled down.
Design Software Considerations
When selecting your design software, evaluate its capabilities for managing layers, manipulating colors, and exporting in appropriate formats. Vector-based programs like Illustrator provide scalable graphics without quality loss, ideal for sharp lines and complex logos. Raster programs like Photoshop excel at photographic images and intricate shading, though careful resolution management is crucial for print. Familiarize yourself with the color profiles of your chosen software to ensure what you see on screen closely matches the printed output on your inkjet printable temporary tattoo paper. Mastering these tools elevates your designs from amateur attempts to professional-grade custom tattoo stickers.
Mirroring Your Image
A critical step, often overlooked by novices, is printing your design as a mirror image, especially for any text or directional graphics. This reversal is essential because the tattoo transfers face down onto the skin, meaning the image will appear correctly oriented only if printed in reverse. For designs without text or specific orientations, mirroring might be less critical but is still a good practice to ensure consistent application. Most design software includes a simple “flip horizontal” or “mirror image” function that can be applied with a single click. Failing to mirror your design will result in backward text and incorrectly oriented custom tattoo stickers, which is a common and easily avoidable mistake.
Color Accuracy and Printer Settings
Achieving accurate color reproduction on inkjet printable temporary tattoo paper requires careful attention to your printer settings and ink type. Always conduct test prints on regular paper first to conserve your specialized media, making adjustments to brightness, contrast, and color balance as needed. Ensure your printer is set to its highest quality print setting for optimal detail and color vibrancy, especially when working with intricate designs or photographic elements. Selecting the correct paper type in your printer dialogue, often a “glossy photo paper” or similar setting, will calibrate ink dispersion for the specific coating of the tattoo paper. Utilizing genuine manufacturer inks often yields superior results compared to third-party alternatives, preventing potential issues with color shifts or poor adhesion for your custom tattoo stickers.
The Precision of Printing and Adhesive Application
Once your designs are perfectly prepared and mirrored, the printing and adhesive application phases demand meticulous attention to detail for flawless custom tattoo stickers. Load your inkjet printable temporary tattoo paper correctly into your printer, paying close heed to which side is the printable surface; often, this is the glossy or slightly textured side. Ensure that no dust particles or fingerprints contaminate the printable area, as these imperfections will transfer to your final tattoo. A clean, dust-free environment is paramount during this sensitive stage. Printing a test page on plain paper first is always a prudent step, confirming that the layout and colors are exactly as intended before using your specialized paper.
Printing the Design
After confirming your printer settings and paper orientation, proceed with printing your custom designs onto the inkjet printable temporary tattoo paper. Allow the freshly printed sheets to dry completely for at least 10-15 minutes, or as recommended by the paper manufacturer. Rushing this step can lead to smudged ink or poor adhesion of the overlay, compromising the entire project. Pigment-based inks generally offer better water resistance and fade resistance for temporary tattoos compared to dye-based inks, though both types are commonly used. Proper drying time ensures the ink is fully cured, providing a stable foundation for the next crucial step in creating durable custom tattoo stickers.
Applying the Adhesive Overlay
The clear adhesive overlay is a critical component that seals your printed design and facilitates its transfer to the skin. Carefully peel back a small section of the backing from the adhesive sheet, aligning it precisely with one edge of your printed inkjet printable temporary tattoo paper. Slowly and steadily, press the adhesive film down over your entire design, working from one end to the other to avoid trapping air bubbles. Employ a squeegee, credit card, or even the edge of a ruler to firmly smooth the adhesive layer onto the printed sheet, expelling any air pockets. This meticulous application ensures a uniform seal, which is vital for both the longevity and appearance of your custom tattoo stickers.
Precise Cutting Techniques
With the adhesive layer securely applied, the next step involves cutting out each individual custom tattoo sticker. Utilize sharp scissors or a craft knife for clean, crisp edges, which contribute significantly to the professional finish of your temporary tattoos. While you can cut right up to the edge of the design, leaving a small border (approximately 1-2 millimeters) around the image can sometimes improve the transfer process and reduce the likelihood of peeling. For intricate designs, a craft knife offers greater precision than scissors, especially when combined with a cutting mat. The quality of your cuts directly influences how seamlessly the temporary tattoo will blend with the skin, enhancing its overall realism and appeal.
Flawless Application of Your Temporary Tattoos
The application process for custom tattoo stickers is straightforward but requires adherence to a few key steps to ensure a smooth, lasting transfer. Begin by thoroughly cleaning and drying the skin area where the temporary tattoo will be applied. Any oils, lotions, or dirt on the skin can interfere with the adhesive bond, leading to premature peeling or an uneven transfer. A quick wipe with rubbing alcohol can effectively prep the skin, ensuring a pristine surface. This preparation stage is crucial for maximizing the adherence and longevity of your temporary tattoo, providing a clean canvas for your design.
Carefully peel off the clear plastic protective layer from your cut-out custom tattoo sticker, exposing the adhesive side with your printed design. Press the tattoo firmly onto the clean, dry skin, ensuring the entire design makes full contact. Hold a damp cloth or sponge against the paper backing for approximately 20-30 seconds, saturating the paper completely. Avoid moving the tattoo during this crucial wetting period to prevent smudging or uneven transfer. Once the paper backing feels thoroughly soaked, gently slide it away from the skin, revealing your perfectly transferred temporary tattoo. Admire your new custom tattoo sticker, allowing it to air dry for a few minutes before touching it.
Maximizing Longevity and Safe Removal Techniques
To ensure your custom tattoo stickers last as long as possible, some simple care practices can significantly extend their wear. Avoid excessive friction from clothing or vigorous scrubbing in the shower, as this can degrade the adhesive and cause premature peeling. Keep the tattooed area dry whenever possible, as prolonged exposure to water can weaken the transfer. Applying a thin layer of petroleum jelly or a non-scented, water-based lotion around the edges can sometimes help seal the tattoo and protect it from incidental contact. Gentle patting dry after washing is far better than rubbing, preserving the integrity of your inkjet printable temporary tattoo paper creation.
When it’s time to remove your custom tattoo stickers, the process is equally simple and gentle on the skin. You can easily remove temporary tattoos by gently rubbing them with baby oil, olive oil, or rubbing alcohol. Apply the oil or alcohol to a cotton ball or soft cloth, then gently massage the tattooed area in circular motions until the design starts to dissolve. For stubborn remnants, a mild soap and water scrub can help, but avoid harsh abrasives. This ensures your skin remains healthy and ready for your next custom tattoo sticker design. Proper removal protects your skin and prepares it for future creative expressions.
Creative Applications and Advanced Strategies
The utility of inkjet printable temporary tattoo paper extends far beyond simple skin adornments; its versatility opens a realm of creative applications and advanced strategies for personalization. Imagine crafting custom tattoo stickers for themed parties, creating unique “guest passes” or fun character elements for costumes. Small businesses can leverage these papers for promotional giveaways, offering branded temporary tattoos at events or as part of product launches. Artists might use them to test design concepts on themselves or models before committing to permanent artwork, providing a temporary preview. The ability to produce vibrant, custom designs quickly makes these papers invaluable for spontaneous creativity.
Consider applying temporary tattoos to non-porous surfaces like phone cases, water bottles, or even candles for a unique decorative touch. This expands their utility beyond skin, transforming everyday objects into personalized statements. For advanced users, combining multiple smaller designs to create a larger, cohesive mural on the skin or an object offers another layer of artistic expression. Experimenting with different printer settings, especially color saturation and brightness, can yield varied effects, from bold and vibrant to subtle and faded. Exploring these creative avenues with inkjet printable temporary tattoo paper unleashes its full potential as a dynamic and engaging crafting medium.
Troubleshooting Common Challenges in Custom Tattoo Production
While creating custom tattoo stickers from inkjet printable temporary tattoo paper is generally straightforward, specific challenges can arise during the process. One common issue is ink smudging or bleeding, which often indicates insufficient drying time after printing or incorrect printer settings. Ensure you allow adequate time for the ink to cure fully before applying the adhesive layer. Another frequent problem involves air bubbles trapped under the adhesive film, leading to unsightly imperfections; this can be mitigated by using a squeegee with firm, even pressure during application. Imperfect transfers, where parts of the design do not adhere to the skin, often result from inadequate wetting of the paper backing or insufficient skin preparation.
Poor longevity of the temporary tattoos can stem from excessive friction, contact with oil-based products, or prolonged water exposure; advising users on proper aftercare can address this. Colors appearing dull or different from the screen version usually points to incorrect printer color profiles or low-quality ink. Adjusting printer settings to “photo paper” and using high-quality inks can often resolve color fidelity issues. Troubleshooting these common pitfalls ensures a smoother, more successful production of vibrant custom tattoo stickers. Each challenge presents an opportunity to refine your technique and improve the overall quality of your inkjet printable temporary tattoo paper projects.
From Printer to Skin: Your Temporary Tattoo Q&A
What is inkjet printable temporary tattoo paper?
It’s a special paper that lets you print custom designs with a home inkjet printer and then transfer them onto your skin as temporary tattoos. It consists of a printable sheet and a thin adhesive film.
How long do temporary tattoos made with this paper typically last?
These temporary tattoos usually last anywhere from a few days to a week. Their longevity depends on factors like placement on the body and how well they are cared for.
Are temporary tattoos made with this paper safe to use on skin?
Yes, reputable brands of temporary tattoo paper are designed to be non-toxic and safe for recreational use on skin. Always ensure you select high-quality materials.
What basic items do I need to make my own custom temporary tattoos?
You will need inkjet printable temporary tattoo paper, an inkjet printer, a high-resolution image for your design, and precision cutting tools like sharp scissors or a craft knife.
Do I need to do anything special to my design before printing it for a temporary tattoo?
Yes, it is crucial to print your design as a mirror image, especially if it contains text or specific orientations. This ensures the image appears correctly once transferred onto your skin.