Caring for a new tattoo properly is crucial for its longevity and your health. Just as you saw in the accompanying video, the initial steps you take make all the difference in how your fresh artwork heals and looks for years to come. Understanding these steps thoroughly ensures your skin recovers beautifully, protecting your investment and your health.
Understanding Your New Tattoo Aftercare Journey
Getting a new tattoo is exciting, but the real work begins when you walk out of the studio. Your skin has just undergone a significant process, and now it needs your help to heal correctly. Think of your new tattoo as an open wound; proper aftercare is essential to prevent infection, preserve the tattoo’s vibrant colors, and ensure crisp lines. Skimping on these steps can lead to a faded design, scarring, or even serious health issues.
The First Crucial Step: Removing the Initial Wrap
When your artist finishes your tattoo, they typically wrap it to protect it during those vulnerable first few hours. The video highlights removing cling wrap, often used for this initial protection. You can generally remove this wrap after a couple of hours. This short window is just enough time to protect the fresh tattoo from bacteria and irritation as you leave the studio and get home.
Imagine if you left the cling wrap on for too long; it could trap moisture, sweat, and even bacteria against your skin, creating a perfect breeding ground for infection. On the other hand, removing it too soon might expose the raw skin to airborne contaminants before you’re ready to clean it. The “couple of hours” guideline strikes a balance, offering initial protection without suffocating your skin.
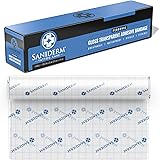
It’s also worth noting that some artists might use a different type of initial bandage, such as a medical-grade adhesive film like Saniderm or Tegaderm. These specialized bandages can often stay on for several days, creating a “second skin” environment that promotes healing. Always follow your tattoo artist’s specific instructions for the type of wrap they used, as the removal time varies significantly.
Washing Your Fresh Tattoo: The Gentle Cleanse
After removing the wrap, your next critical task is to gently wash your new tattoo. This step removes any excess ink, blood, plasma, and ointment that may have accumulated. This is where your new tattoo aftercare truly begins.
You need lukewarm water and a mild, fragrance-free soap. The video specifically mentions using an aftercare foam cleanser from Stories & Ink and suggests Dial foaming antibacterial soap as a good alternative. The key here is “mild” and “fragrance-free.” Imagine if you used a harsh soap with strong perfumes; those chemicals could irritate your sensitive, healing skin, causing redness, dryness, or even an allergic reaction. A mild soap cleanses effectively without stripping your skin’s natural barriers.
Gently massage the soap into the tattooed area using your fingertips. Avoid scrubbing or using a washcloth, which can be too abrasive. Your goal is to carefully remove any sticky residue, blood, or plasma that might have seeped out. Plasma, in particular, can dry and form thick scabs, which you absolutely want to avoid because picking them off can pull out ink and damage the tattoo. Once you feel the area is clean, give it a final rinse with lukewarm water, making sure all soap residue is gone.
The Art of Drying: Why Paper Towels Are Best
Drying your new tattoo might seem straightforward, but it’s a step where many people make mistakes. As the video emphasizes, avoid using a regular bath towel. Why? Regular towels, even freshly laundered ones, can harbor bacteria and lint. Imagine if microscopic fibers or unseen germs transferred from your towel to your open tattoo; this significantly increases your risk of infection. Furthermore, the rough texture of a bath towel can irritate or even damage the delicate, healing skin.
The solution is simple: use a clean, brand new paper towel. Gently pat the entire area dry. The “pat, don’t rub” rule is vital here. Once you’ve blotted away most of the moisture, it’s very important to let your tattoo fully air dry. This might take a few minutes, but it’s crucial. Why? Because you don’t want to lock in moisture when you apply your aftercare ointment. Trapped moisture under a balm creates a damp environment, which again, can promote bacterial growth and hinder proper healing. Let it breathe and completely dry before the next step.
Nourishing Your Skin: Applying Aftercare Ointment
Once your tattoo is completely dry, it’s time to apply your aftercare product. The video recommends a tattoo aftercare balm for fresh tattoos, such as the Stories & Ink product. A balm is often preferred over a thin lotion during the initial healing phase because it provides a more protective barrier and typically has a richer, more emollient texture that supports skin repair.
Apply only a very thin layer throughout the tattoo and gently rub it in. How thin is “thin”? Think of it this way: your tattoo should look moisturized, but not greasy or shiny. You shouldn’t be able to see a thick white layer of balm sitting on top of your skin. Imagine if you caked on a thick layer; it would suffocate your skin, preventing it from breathing and potentially leading to clogged pores or delaying the healing process. The goal is to keep the skin hydrated and protected, not smothered.
A thin layer ensures the skin can still access air while staying moisturized, which is essential for healthy healing. This helps prevent excessive dryness, itching, and cracking of the scabs, which can ultimately lead to a better-looking healed tattoo.
The Healing Rhythm: Frequency and Duration of Care
Consistency is key when healing a new tattoo. The video advises repeating these steps—washing, drying, and moisturizing—two or three times a day for a few days. This initial “few days” typically refers to the first 3-5 days, which are the most critical for preventing infection and kickstarting the healing process.
As your tattoo progresses in its healing journey, usually within the first week or two, you might notice it starts to peel like a sunburn. This is a normal part of the process, as your body sheds the damaged outer layers of skin and new skin forms. Continue with your washing and moisturizing routine during this phase. You can often switch to a good quality, unscented lotion after the initial intense healing phase (around 1-2 weeks), but stick with the balm if your artist recommends it or if you find it more comforting.
Keep moisturizing regularly for several weeks, or even months, until the skin feels completely normal. Even after your tattoo appears healed on the surface, the deeper layers of skin are still recovering. Proper, consistent care during this period supports the long-term health and appearance of your tattoo.
Beyond the Basics: Essential Tips for Healing and Long-Term Care
Healing a new tattoo involves more than just washing and moisturizing. Consider these additional points for a smooth recovery and to ensure your tattoo remains vibrant:
- Avoid Soaking: For the first 2-4 weeks, avoid swimming pools, hot tubs, baths, and prolonged showers. Imagine if you soaked your fresh tattoo in a communal pool; it’s a direct invitation for bacteria and chemicals to enter your healing skin. Quick showers are fine, but keep the tattooed area out of direct spray as much as possible.
- Choose Loose Clothing: Wear loose, breathable clothing over your new tattoo. Tight clothing can rub against the tattoo, causing irritation, chafing, and even pulling off scabs prematurely. Cotton is an excellent choice.
- Sun Protection is Paramount: Direct sunlight is extremely damaging to a healing tattoo. It can cause fading, blistering, and severely prolong the healing process. Keep your new tattoo completely out of the sun for at least 3-4 weeks. Once healed, always use a high-SPF sunscreen to protect your tattoo from UV damage, which is the number one cause of tattoo fading.
- Resist the Itch: As your tattoo heals, it will likely become itchy. It’s vital that you do not scratch, pick, or peel any scabs or flaky skin. Imagine if you aggressively scratched your tattoo; you could pull out ink, create scars, and introduce bacteria, leading to a damaged design or infection. If the itch is unbearable, try gently patting the area or applying a thin layer of your aftercare balm.
- Stay Hydrated and Healthy: Your overall health plays a role in how well your skin heals. Drink plenty of water and maintain a balanced diet. A healthy body leads to healthier skin and a more efficient healing process.
- Listen to Your Body and Artist: Pay attention to your tattoo. If you notice signs of infection—excessive redness, warmth, swelling, pus, foul odor, or fever—seek medical attention immediately. Always prioritize your artist’s specific instructions, as they know their process and your skin best.
Following these steps meticulously and being diligent with your new tattoo aftercare ensures your artwork heals perfectly, ready to be a beautiful part of you for many years to come.
Your Fresh Ink Aftercare Questions Answered
Why is it important to properly care for a new tattoo?
Proper aftercare is crucial for your health and the tattoo’s longevity. It helps prevent infection, preserves vibrant colors, and ensures crisp lines for years to come.
When should I remove the initial bandage from my new tattoo?
If your artist used cling wrap, you can generally remove it after a couple of hours. Always follow your tattoo artist’s specific instructions, as removal times vary for different types of bandages.
What kind of soap should I use to wash my new tattoo?
You should use lukewarm water and a mild, fragrance-free soap. This type of soap cleanses effectively without irritating your sensitive, healing skin.
How should I dry my new tattoo after washing it?
Gently pat the entire area dry using a clean, brand new paper towel. After patting, allow your tattoo to fully air dry for a few minutes before applying any aftercare products.
How often should I wash and moisturize my new tattoo?
You should repeat the steps of washing, drying, and moisturizing two or three times a day. Continue this routine consistently for the first few days, which are critical for healing.