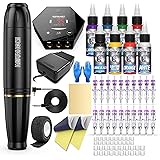
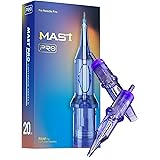
Embarking on the journey of tattoo artistry requires precision, dedication, and, critically, a thorough understanding of your tools. The accompanying video offers a concise, visual guide to assembling a **beginner tattoo kit** featuring a coil tattoo machine. While visual demonstrations are invaluable, delving into the intricacies of each step provides aspiring artists with a foundational comprehension that transcends simple mechanics.
This comprehensive guide complements the video by expanding on essential setup procedures, offering insights into the ‘why’ behind each action, and preparing you for the nuanced world of professional tattooing. Understanding these initial steps not only ensures your equipment functions correctly but also lays the groundwork for developing consistent technique and upholding paramount safety standards.
Demystifying Your First Coil Tattoo Machine Setup
Before you even power on, familiarizing yourself with each component of your **tattoo machine kit** is paramount. A coil machine, often the workhorse for many artists, operates on an electromagnetic principle, driving a needle grouping with reciprocating motion. While rotary machines have gained popularity for their consistency and quieter operation, mastering a coil machine provides an invaluable understanding of tattoo physics and dynamics.
Each part—from the machine frame to the armature bar—plays a distinct role in ensuring stable, reliable performance. A true tattoo artist comprehends how these individual elements contribute to the overall efficiency and effectiveness of their equipment. Neglecting this foundational knowledge can hinder progress and compromise the quality of your work from the outset.
Precision Assembly: From Tube to Tip
The initial assembly of your tattoo machine demands meticulous attention. It is here that you establish the stability and alignment crucial for effective ink delivery and controlled artistry. Every component must be seated and secured with exacting care, preventing issues that could mar your work or even damage the machine.
Securing the Grip and Tube Vice
The video illustrates tightening the tube and handle with an Allen key, a seemingly minor step with significant implications. The grip, often an aluminum or stainless steel tube, is where the artist holds the machine, dictating control and comfort. This tube must be securely clamped into the tube vice—the mechanism that holds the grip firmly to the machine frame.
Imagine attempting a delicate shading pass or a crisp outline with a loose grip. The resulting tremor and lack of control would inevitably lead to an inconsistent line, potentially causing blowout or uneven saturation. The Allen key ensures a robust, vibration-dampening connection, providing the stability required for precision tattoo application.
Integrating the Stainless Steel Tip
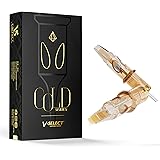
Similarly, the stainless steel tip, which guides the tattoo needle, requires an equally firm attachment. These tips are crucial for not only directing the needle’s trajectory but also for holding a small reservoir of ink, ensuring a steady flow to the skin. Tips come in various configurations, such as round tips for lining and shading, or magnum tips for larger filling and blending, each designed for specific needle groupings and artistic effects.
When tightening the tip, it is essential to ensure it’s concentric with the tube and perfectly aligned with the needle bar’s path. Any misalignment can cause friction, needle deflection, or even damage to the needle or tip. This precision in setup is non-negotiable for producing clean, professional-grade tattoos.
Needle Installation and Depth Control
Proper needle installation is perhaps the most critical step in preparing your **tattoo machine**. It directly impacts ink implantation, minimizing skin trauma, and achieving desired artistic effects. This process involves several interconnected components working in harmony.
Engaging the Buckle Mechanism
The instruction to ‘loosen the buckle and put the tattoo needle in’ refers to the tube vice’s clamping mechanism. The buckle securely holds the needle bar, which is the long steel rod to which the actual tattoo needle is soldered. A properly seated needle bar ensures that the needle moves consistently without lateral play or excessive vibration.
This secure seating is vital because any looseness could lead to the needle “jumping” or vibrating erratically, causing inconsistent lines, patchy fills, or unnecessary trauma to the skin. The buckle’s function is to maintain this critical stability, ensuring a predictable path for the needle.
The Critical Role of the Grommet and Armature Bar
‘Fix the grommet to the armature bar’ highlights a small but incredibly important component. A grommet is a small rubber nipple that fits onto the armature bar, which is the moving component of the coil machine that the coils pull downwards. The needle bar hooks into this grommet.
The grommet serves multiple purposes: it dampens vibrations, provides a clean connection point between the needle bar and the armature bar, and acts as an electrical insulator. Without a grommet, the needle bar would directly contact the armature bar, leading to excessive wear, noise, and potential electrical shorting. This seemingly minor component is fundamental to the smooth, controlled reciprocating motion of the tattoo needle.
Mastering Needle Protrusion and Stroke Length
The ability to ‘adjust the position of aluminum tube to control the needle length’ is a foundational skill for any tattoo artist. Needle protrusion refers to how far the needle extends beyond the tip. This adjustment is crucial and varies significantly depending on the tattooing technique, skin type, and the desired effect.
For instance, precise lining often requires a shorter protrusion (1-2mm) for greater control, while packing color or shading might necessitate a slightly longer protrusion (2-3mm) to effectively implant ink without overworking the skin. Imagine attempting to execute a delicate whip shade with a liner needle protrusion that’s too long; the results would be patchy, inconsistent, and potentially damaging to the client’s skin. Moreover, understanding the machine’s stroke length—the full distance the needle travels up and down—in conjunction with protrusion, allows for optimal tuning, impacting everything from ink delivery to skin trauma.
Energizing Your Setup: Power Supply Protocols
With your machine assembled, the next step involves connecting it to the power source. This transition from static components to an active machine requires careful attention to electrical connections and initial voltage settings. A reliable power supply is the heart of your **beginner tattoo machine kit**.
Connecting the Foot Pedal
The foot pedal is your primary control interface for the tattoo machine. It allows for hands-free operation, activating and deactivating the machine by simply pressing down. Connecting the foot pedal securely to the power supply ensures uninterrupted power delivery. While some pedals are momentary (active only when pressed), others can be switched to continuous mode, offering different operational advantages depending on the artist’s preference and the task at hand.
A loose or faulty connection can lead to frustrating interruptions during a tattoo session, breaking concentration and potentially compromising the work. Always ensure the jack is fully inserted into the designated port on your power supply unit.
Attaching the Tattoo Machine via Clip Cord
The clip cord transmits electrical current from the power supply to the tattoo machine. One end typically plugs into the power supply, while the other features a clip that attaches to the machine’s binding posts. It is imperative that these connections are secure, providing a stable electrical path. Poor clip cord connections can lead to intermittent power, voltage drops, and inconsistent machine performance, manifesting as uneven lines or poor saturation.
The clip cord, often overlooked, is a crucial link in the chain, requiring regular inspection for wear or damage. Maintaining its integrity is part of comprehensive machine care.
Initial Power Supply Check
The video’s tip, ‘Please check the power supply can work normally first,’ is a fundamental pre-tattooing protocol. This involves verifying that the unit powers on, displays voltage readings correctly, and responds to adjustments. Before connecting your machine, a quick self-test confirms the power supply’s operational integrity.
For coil machines, typical operating voltages range from 6 to 10 volts, though this varies based on the machine’s tuning, needle grouping, and the specific task (lining usually requires higher voltage for speed and precision, while shading benefits from slightly lower, smoother voltage). Starting with a mid-range voltage and adjusting incrementally allows you to find the ‘sweet spot’ for your particular machine and needle configuration, optimizing performance for your **beginner tattoo kit**.
Beyond Basic Assembly: Key Considerations for Aspiring Tattoo Artists
While assembly is foundational, the journey into tattoo artistry extends far beyond the mechanical setup. Developing into a competent tattoo artist involves a holistic approach that prioritizes safety, continuous learning, and proper maintenance.
Upholding Professional Standards and Safety
The brevity of the video necessitates an expansion on the critical importance of hygiene, sterilization, and cross-contamination prevention. Every item that touches the client must be sterile and single-use, especially needles. Proper barrier methods, surface disinfection, and waste disposal are not mere suggestions but absolute requirements in the tattoo industry.
Aspiring artists must commit to rigorous safety protocols from day one, beginning with practicing exclusively on synthetic skin or fruit, never on human skin, until proficient under professional supervision. This commitment safeguards both the artist and potential clients.
Understanding Machine Tuning and Maintenance
A coil tattoo machine is a sophisticated instrument that benefits from proper tuning. While your **beginner tattoo kit** provides a ready-to-use setup, understanding concepts like adjusting the gap between the contact screw and the front spring, or modifying spring tension, allows for advanced customization. These adjustments fine-tune the machine’s speed, power, and throw, optimizing it for different styles and techniques.
Regular cleaning and inspection of all components, particularly after use on practice skin, prevent ink buildup, rust, and wear. Proper maintenance extends the lifespan of your equipment and ensures consistent performance throughout your career.
Navigating Quality Assurance and Support for Your Beginner Tattoo Kit
Manufacturers often provide crucial support, especially for beginners. The video highlights several ‘Little Tips’ regarding quality assurance and customer service. Notably, the mention of a “6 months” free replacement service for key components like the tattoo machine, foot pedal, and clip cord offers significant peace of mind for new artists navigating their first equipment.
This commitment to post-purchase support underscores the importance of choosing a reputable **beginner tattoo kit**. While the included instructions provide general assembly guidance, for any further technical issues or advanced questions, direct communication with the supplier is always the most prudent course of action. Leverage these resources to troubleshoot effectively and continue learning.
Navigating Your First Tattoo Machine: A Wormhole Tattoo Q&A
What is a coil tattoo machine?
A coil tattoo machine uses electromagnetic principles to drive a needle grouping with a reciprocating motion. It is a fundamental type of tattoo machine that helps artists understand tattoo physics.
Why is it important to securely tighten the grip and tube on my tattoo machine?
Securely tightening the grip and tube ensures stability and alignment, which is crucial for effective ink delivery and controlled artistry. A loose connection can lead to inconsistent lines or damaged work.
What is a grommet and why is it important for the tattoo needle?
A grommet is a small rubber piece that connects the needle bar to the armature bar of the machine. It dampens vibrations, provides a clean connection, and helps ensure the needle moves smoothly.
How do I control how far the tattoo needle extends from the tip?
You can adjust the position of the aluminum tube (grip) to control how much the needle protrudes from the tip. This adjustment is important for different tattooing techniques and effects.
What are the main components needed to power my tattoo machine?
To power your tattoo machine, you will connect a foot pedal and a clip cord to your power supply unit. The foot pedal allows hands-free activation, and the clip cord transmits electricity to the machine.