Embarking on the journey of getting a new tattoo is an exhilarating experience, a chance to express yourself through body art. However, as the video above eloquently explains, the excitement doesn’t end when the needle stops humming. In fact, a significant **80% of your new tattoo’s final appearance** hinges on the meticulous care you provide during its healing phase. This crucial period, often fraught with questions and anxieties for first-timers, is a complex biological process where your skin undergoes three distinct stages of repair.
Understanding these **tattoo healing stages** is paramount to ensuring your art remains vibrant, crisp, and free from complications for years to come. While some aspects of the process, like peeling or a dull appearance, might seem alarming, they are typically normal indicators of your skin diligently working to recover. This guide will elaborate on each stage, providing a deeper dive into what to expect and the specific actions you can take to foster optimal **tattoo healing**.
The Critical Role of Proper Tattoo Aftercare
A fresh tattoo is essentially an open wound, making it highly susceptible to bacteria and potential infection. The initial days and weeks are critical, as your body actively repairs the skin disrupted by the tattooing process. Neglecting proper **tattoo aftercare** can lead to blurred lines, faded colors, and even serious health risks, diminishing both the aesthetic quality and the safety of your new body art.
Adhering to a strict **tattoo care routine** not only safeguards your health but also ensures your investment in art truly shines. Consistent cleaning, moisturizing, and protection are foundational elements that contribute to a successful outcome. The goal is to create an environment where your skin can heal efficiently, locking in the ink and preserving the artist’s work.
Stage 1: The Initial Vulnerable Phase (Days 1-6)
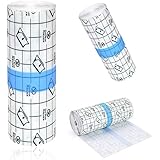
Immediately after your tattoo session concludes, your skin is in its most vulnerable state. The artist typically cleans the area and applies a protective wrap, such as plastic film or a specialized breathable bandage. Once you’re home, as suggested in the video, removing this initial wrap and allowing the **new tattoo** to air out for a short period is often recommended, giving the skin a chance to breathe after the trauma it endured.
Meticulous Cleaning and Protection Against Infection
During this first stage, your body initiates an inflammatory response, leading to some redness, swelling, and mild oozing of blood, plasma, and excess ink. This is a normal part of the **tattoo healing process**. The most critical step here is regular cleaning, ideally **at least three times a day**, using warm water and a mild, unscented antibacterial soap. This practice is vital for removing harmful bacteria and preventing **tattoo infection**.
When washing, gently cup warm water over the tattoo and use your fingertips to softly lather and rinse away any residue. A pro-tip, highlighted in the video, is to finish with a rinse of cold water. This helps to close the skin’s pores, which can aid in trapping the ink more effectively and potentially reducing ink blotting or loss, contributing to a brighter, more vibrant tattoo in the long run. After cleaning, gently pat the area dry with a clean paper towel, avoiding harsh rubbing.
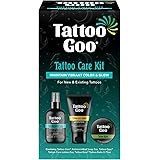
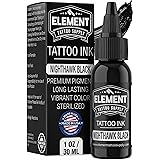
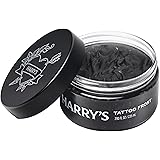
Applying the Right Healing Ointment
Once clean and dry, applying a thin layer of a recommended healing ointment like Aquaphor or A+D is essential. The emphasis here is on “thin layer.” Over-applying ointment can suffocate the skin, clog pores, and trap moisture, creating an ideal breeding ground for bacteria and potentially hindering the **skin repair** process. A thin, breathable barrier promotes healing while keeping the area moisturized and protected.
This initial phase can last anywhere from **one to six days**, depending on the tattoo’s size, location, and your individual body’s healing capacity. While some oozing, swelling, and redness are expected, excessive pain, pus, or fever are signs that warrant immediate consultation with a medical professional, as these could indicate a serious infection.
Stage 2: The Dreaded Peeling Stage (Days 7-14)
As your tattoo transitions from the initial inflammatory phase, your skin begins its major regenerative work, typically around the 7-day mark. This is when many people, particularly those new to tattoos, start to panic. The second stage of **tattoo healing** is characterized by peeling, flaking, and intense itching, a direct result of the top layer of skin dying off and shedding. This is a completely normal and necessary part of your skin’s recovery from the trauma of the needles.
Embracing the Peel and Combating the Itch
Beneath the peeling skin, new, delicate skin cells are rapidly forming to protect the embedded ink. During this time, your tattoo will likely appear dull, cloudy, or even “nasty” as described in the video. This is temporary and resolves as the dead skin fully sheds. The itching can be quite significant, but it is absolutely crucial to resist the urge to scratch, pick, or forcefully peel the flakes.
Interfering with the natural peeling process can pull out ink, create scars, and ultimately compromise the **ink quality** and longevity of your tattoo. Gently washing the tattoo **three times a day** with an unscented soap will naturally aid in the removal of loose skin flakes. You’ll notice flakes coming off during washing, which is perfectly normal; the key is to be gentle and allow them to detach naturally rather than force them.
Switching to a Lighter Moisturizer
During this peeling phase, it’s time to switch from a thick ointment to a lighter, unscented lotion. Products like Aquaphor, while excellent for the initial open wound phase, are too dense for peeling skin. Their thickness can tug at the skin flakes, potentially ripping them off prematurely and causing damage. A lightweight, breathable moisturizer keeps the skin hydrated without interfering with the natural shedding process.
Continue applying the unscented lotion regularly to combat dryness and reduce itching. This stage typically lasts for **seven to 14 days**, though individual healing times can vary. Patience and consistent gentle care are your best allies during this often uncomfortable but vital phase of **tattoo aftercare**.
Stage 3: The Settling and Strengthening Phase (Days 15-30+)
Congratulations, you’ve made it past the most visibly dramatic parts of the **tattoo healing process**! The third stage, often considered the “settling” phase, begins once the visible peeling has largely subsided. While the top layer of your skin may appear healed, the underlying layers are still actively repairing and strengthening. This is where the **ink in your tattoo** truly begins to settle into its permanent home.
Protecting Your Tattoo During Deeper Healing
During this stage, your tattoo might still appear slightly cloudy or dull. This is entirely normal and indicates the final layers of skin are coalescing over the ink. It’s crucial to continue protecting the area. Avoid any activities that involve excessive stretching or pulling of the tattooed skin, as this can disturb the settling ink and potentially lead to premature fading over time. Think about the tattoo’s location and adjust your movements or exercise routine accordingly.
You can gradually reduce the frequency of dedicated tattoo washes, eventually integrating your tattoo into your normal shower routine. However, it’s still advisable to avoid harsh washcloths, loofahs, or abrasive shower essentials directly on the tattooed area. Your skin is still delicate and benefits from a gentle approach. Continued moisturizing with a good quality, unscented lotion remains vital to keep the skin supple and support its final stages of recovery.
As the days and weeks progress, and your **fresh tattoo** fully heals, you will notice it becoming darker, more vibrant, and its details becoming sharper. This full completion of stage three can take anywhere from **15 to 30 days**, or even longer for larger or more complex pieces. The final result is a testament to both your artist’s skill and your diligent **tattoo aftercare**.
Beyond the initial healing stages, maintaining a consistent daily **tattoo care routine** is key to ensuring your body art remains a source of pride for years to come. Protecting it from sun exposure, keeping it moisturized, and staying hydrated are all simple yet effective steps to enhance **tattoo longevity** and vibrancy, truly making your efforts to **heal your tattoo** worthwhile.
Ink Aftercare Clinic: Your Healing Questions Answered
Why is proper aftercare important for a new tattoo?
Proper aftercare is crucial because 80% of your new tattoo’s final appearance depends on it. It also prevents infections and health risks since a fresh tattoo is essentially an open wound.
What are the three main stages of tattoo healing?
Tattoo healing goes through three main stages: the initial vulnerable phase (days 1-6), the peeling stage (days 7-14), and the settling and strengthening phase (days 15-30+). Each stage requires specific care.
How often should I clean my new tattoo and with what?
You should clean your new tattoo at least three times a day using warm water and a mild, unscented antibacterial soap. Gently wash the area with your fingertips and pat it dry with a clean paper towel.
What kind of moisturizer should I use for my healing tattoo?
In the first stage, apply a thin layer of a healing ointment like Aquaphor or A+D. Once peeling begins, switch to a lighter, unscented lotion to keep the skin hydrated without suffocating it.
Is it normal for my new tattoo to peel and itch?
Yes, it is completely normal for a new tattoo to start peeling, flaking, and itching around the 7-day mark. This is a natural part of the skin’s recovery process, but you must resist scratching or picking at it.