Ensuring proper **tattoo aftercare** is paramount for the longevity and vibrancy of your new body art. While getting a tattoo is an exciting experience, the healing process is where the real work begins, directly influencing how your tattoo will look for years to come. In the accompanying video, May shares her straightforward, tried-and-true methods for caring for her numerous tattoos, offering practical advice based on her personal experiences and a few learning curves.
This guide expands on May’s valuable insights, diving deeper into each stage of tattoo healing with additional context and expert considerations. We aim to provide a comprehensive resource for optimizing your tattoo’s healing journey, ensuring your ink stays as stunning as the day you got it.
The Crucial First Step: Managing Your Initial Tattoo Bandage
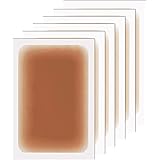
After your tattoo artist finishes their work, the first line of defense for your fresh ink is the bandage. Modern tattoo aftercare often involves advanced “second skin” bandages like Saniderm or Hypofix, which differ significantly from the traditional gauze and tape. These innovative films create a sterile, breathable barrier, protecting your fresh tattoo from external contaminants while allowing it to breathe and begin the healing process in a moist environment.
May, with her extensive experience of around 80 tattoos, highlights the benefits of these second-skin bandages. She emphasizes leaving them on for as long as safely recommended by your artist, typically between 12 hours and two days. This extended wear time allows the initial oozing and plasma to form a protective layer, aiding in healing and minimizing scabbing. For instance, if your artist suggests leaving it on for 24-48 hours, adhere to that timeframe. Imagine if you removed it too soon; your tattoo could be exposed to bacteria or friction prematurely, hindering its initial healing phase.
Mastering the Art of Second Skin Removal
One of May’s key revelations, learned from her Instagram community, is the technique for removing these second-skin bandages. Ripping it off dry is a common mistake that can be painful and potentially irritating to the delicate skin beneath. The optimal method involves wetting the area. This helps loosen the adhesive, allowing the bandage to peel away gently without stressing the skin.
-
In the Shower: The best place to remove a second skin bandage is in a warm, steamy shower. The water helps to relax the skin and dissolve the adhesive.
-
Stretch and Pull: Instead of pulling straight up, grab a corner of the bandage and stretch it parallel to your skin. The water will help it release smoothly. Pull away gently, allowing the running water to assist in the process. This significantly reduces discomfort and irritation, ensuring a smoother transition to the next stage of tattoo aftercare.
The Initial Cleanse: Gentle Care for Your New Tattoo
Once the bandage is off, your tattoo needs its first proper wash. This step is critical for removing any residual blood, plasma, or ink, which, as May notes, can look a bit “gross” but is a normal part of the healing process. The goal here is cleanliness without harshness.
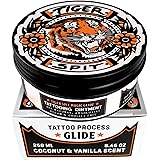
Use only your clean hands and warm water at first. Avoid any abrasive tools like washcloths, loofahs, or exfoliating mitts, as these can disrupt the healing skin and potentially introduce bacteria. Following this initial rinse, reach for a non-fragranced, gentle soap. May recommends products like Bioderma shower gel, which is formulated for sensitive skin types, including those prone to conditions like psoriasis or eczema. The absence of harsh chemicals, dyes, and fragrances is crucial because a fresh tattoo is essentially an open wound. Irritants can cause allergic reactions, excessive redness, or prolong the healing time. A balanced active approach here ensures thorough cleansing while protecting the fragile skin barrier.
Lather the gentle soap in your hands and delicately wash the tattooed area. Rinse thoroughly with warm water, ensuring no soap residue remains. After showering, pat the area dry with a clean paper towel or a dedicated clean towel. Again, resist the urge to rub; gentle patting is all that’s needed to prevent friction and irritation.
The “Dry Healing” Phase: May’s Unique Approach to Tattoo Aftercare
May introduces a method she’s adopted over her six years of getting tattooed: a dry healing period immediately after cleaning. For the first 12 to 24 hours post-bandage removal, she refrains from applying any moisture or occlusive products to the tattoo. Her rationale is that the tattoo is an open wound, and she believes that allowing it to dry naturally helps it heal better initially. This approach allows the skin to “breathe” and form a natural protective layer before introducing external emollients. This can be considered an intermediate technical depth point as dry healing is less common in general advice but has its proponents.
While many artists recommend immediate moisturizing, May’s experience suggests that this initial dry period works for her skin type, preventing the tattoo from becoming too saturated or suffocated. It’s an interesting perspective on new tattoo care, indicating that what works best can be highly individual. Imagine if you have very oily skin; a brief dry-out period might prevent excessive moisture buildup, which could lead to irritation.
The Importance of Loose Clothing
Regardless of your chosen dry-healing or immediate-moisturizing method, one universal tip for **tattoo aftercare** is to wear loose clothing over your healing tattoo. May underscores this, advising garments you don’t mind getting stained. Fresh tattoos can leak plasma and ink, especially during the first few days. Tight clothing can rub against the tattoo, causing friction that irritates the skin, potentially pulling out ink, or even leading to infection. Furthermore, ink stains on cherished clothing are notoriously difficult to remove.
Loose, breathable fabrics like cotton allow air circulation, which is vital for healing. They prevent the tattoo from becoming overly moist and reduce the risk of fabric sticking to the healing skin. This simple addition to your routine can significantly impact your healing process and comfort.
Moisturizing Your Healing Tattoo: When and What to Use
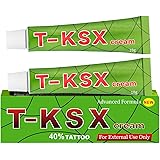
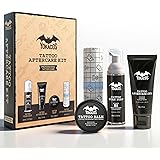
After your chosen initial dry period, or immediately if you’re following a more traditional aftercare routine, moisturizing becomes a key component. The goal is to keep the skin hydrated, soft, and less prone to intense itching and flaking, without suffocating it. May recommends a non-fragranced lotion, specifically mentioning CeraVe Moisturizing Cream. This product is a staple in many aftercare routines due to its basic, gentle formula.
Products containing hyaluronic acid, like CeraVe, are excellent for tattoo healing because hyaluronic acid is a powerful humectant, meaning it draws moisture into the skin. This aids in maintaining skin barrier function and promoting a healthy healing environment. Look for creams that are free from dyes, fragrances, and parabens. These can irritate new tattoos. Applying a thin layer, two to three times a day, is usually sufficient. Too much lotion can clog pores and hinder healing.
May notes the satisfying feeling of moisturizing, especially when dealing with the inevitable flakiness of blackwork tattoos. Blackwork often involves more ink saturation, leading to more pronounced scabbing and flaking, making consistent, gentle moisturizing even more important for a smooth healing process. Imagine if you applied a thick, greasy ointment that suffocated the skin; this could trap bacteria and delay healing.
The Golden Rule: Do Not Pick or Scratch!
This is arguably the most crucial piece of advice for **tattoo aftercare**. As May vividly illustrates with her own experiences, picking or scratching a healing tattoo can lead to disastrous results. She openly shares how scratching her tattoos, either subconsciously in her sleep or out of sheer frustration from itchiness, led to “skips” in the linework and ink fallout, leaving areas faded or patchy. These are not just cosmetic issues; picking can also introduce bacteria, leading to infection or scarring.
A healing tattoo will itch; it’s an unavoidable part of the process. The skin is regenerating, and nerve endings are reacting. Here’s how to manage the itch without causing damage:
-
Gentle Patting: If the itch is unbearable, gently pat the area with the palm of your hand. Never scratch directly.
-
Moisturize: Often, itchiness is a sign of dry skin. Reapply a thin layer of your chosen fragrance-free moisturizer.
-
Cool Compress: A clean, cool compress (not ice directly) can provide temporary relief.
-
Distraction: Sometimes, simply redirecting your attention can help manage the urge to scratch.
Remember, once the ink falls out due to picking, the only way to fix it is through a touch-up, which can be an additional cost and another healing process. Preventing tattoo damage is far easier than repairing it.
Additional Considerations for Optimal Tattoo Healing
Beyond the core steps, several other factors contribute to effective **tattoo aftercare** and a beautiful final result:
-
Hydration: Drink plenty of water. Hydrated skin heals better from the inside out.
-
Sun Protection: Keep your new tattoo out of direct sunlight. UV rays can damage healing skin and cause ink to fade. Once healed, always use a high-SPF sunscreen on your tattoos.
-
Avoid Soaking: Steer clear of baths, swimming pools, hot tubs, and saunas until your tattoo is fully healed (typically 2-4 weeks). Submerging the tattoo can introduce bacteria and lead to infection.
-
Healthy Lifestyle: A balanced diet and adequate sleep support your body’s immune system, which is crucial for healing.
-
Listen to Your Body: If you notice excessive redness, swelling, pus, or fever, seek medical attention immediately. These could be signs of infection.
May’s emphasis on keeping her routine “super simple, very basic” is a testament to the power of consistency and gentle care. While she humbly states she’s not an expert, her experience with dozens of tattoos, coupled with her candid advice on avoiding common mistakes, offers invaluable insights into effective new tattoo care. Your skin is unique, and finding a routine that works best for you, always guided by your tattoo artist’s initial instructions, is key to preserving your artwork.
Beyond the Bandage: Your Tattoo Healing Questions Answered
What is the first step I should take after getting a new tattoo?
After your tattoo artist applies the initial bandage, often a ‘second skin’ type, keep it on for the period they recommend, typically between 12 hours and two days. This protects your fresh tattoo from contaminants and aids initial healing.
How should I remove the ‘second skin’ bandage from my new tattoo?
The best way to remove a second-skin bandage is in a warm, steamy shower. Let the water help loosen the adhesive, then gently stretch and peel the bandage parallel to your skin.
How do I clean my new tattoo after the bandage is off?
Use only your clean hands and warm water with a non-fragranced, gentle soap to delicately wash the tattooed area. Rinse thoroughly to remove all soap residue, then gently pat it dry with a clean paper towel or towel.
Why is it important not to pick or scratch a healing tattoo?
Picking or scratching a healing tattoo can cause ink to fall out, leading to faded or patchy areas, and may also introduce bacteria that can cause infection or scarring. If it itches, gently pat the area or moisturize it.
What type of clothing should I wear over a new tattoo?
Wear loose, breathable clothing, preferably made of cotton, over your healing tattoo. This prevents friction, allows air circulation, and reduces the risk of irritation or ink transfer to cherished clothes.